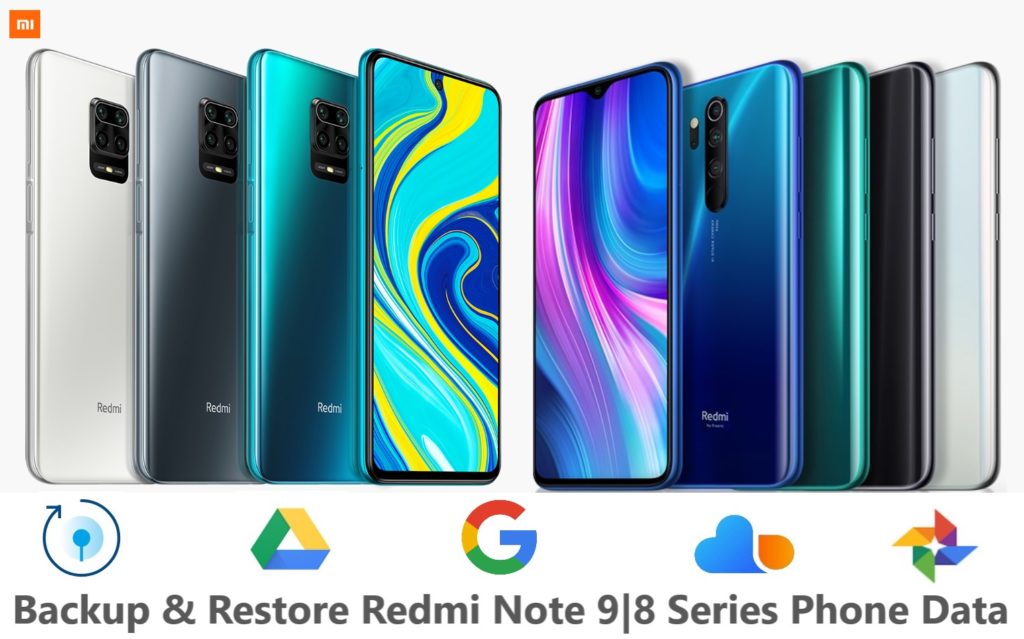
Learn 3 best ways to backup and restore Redmi Note 9s/9 Pro/9 Pro Max/8/8T/8 Pro data. Find out how to backup data such as Apps, Photos, Videos, Contacts, Messages, Documents, WhatsApp, Voice Memos, and other data from Redmi Note 9s/9 Pro/9 Pro Max/8/8T/8 Pro to Cloud and PC.
If you are a Redmi phone user and got Redmi Note 9 series or Redmi Note 8 series phone. You would always want to keep your important data safe.
It is wiser to be safe than sorry! You must take added measures to protect your data stored in your Redmi smartphones.
We now save everything we could on our smartphones. All our precious moments of life, all those birthdays, anniversaries, trips and tours, the vacations in form of photos and videos.
Along with that many people also save work-related files and documents that nobody would like to lose at any cost.
When you have so much data and information in your Redmi Note 9s/9 Pro/9 Pro Max/8/8T/8 Pro, it becomes extremely important to back up your Phone’s data.
So, to keep your Redmi Note 9s/9 Pro/9 Pro Max/8/8T/8 Pro data safe against any adversities that may cause data loss, we have prepared this article for all Redmi Note 9s/9 Pro/9 Pro Max/8/8T/8 Pro smartphone users.
If you want to keep Redmi Note 9s/9 Pro/9 Pro Max/8/8T/8 Pro data safe forever, read this comprehensive article on, how to backup and restore Redmi Note 9s/9 Pro/9 Pro Max/8/8T/8 Pro and keep your data safe.
Now there are various ways that you can use to back up and restore data on your Redmi Note 9s/9 Pro/9 Pro Max/8/8T/8 Pro, with help of various applications and software.
Here we have selected the 4 best ways that can be used to backup and restore data on your Redmi Note 9s/9 Pro/9 Pro Max/8/8T/8 Pro. To know how to backup and restore Redmi Note 9s/9 Pro/9 Pro Max/8/8T/8 Pro go through this post and choose the one method that suits you best.
Method 3. How Backup and Restore Redmi Note 9s/9 Pro/9 Pro Max/8/8T/8 Pro Data Using Mi Cloud.
Easily and quickly backup Redmi Note 9s/9 Pro/9 Pro Max/8/8T/8 Pro data to PC
Backup data like Photos, Videos, Apps, Audio, Call Logs, Documents, Text, WhatsApp Messages, and more. Can restore back backup data from computer to any Redmi Phone too.
No network connection required, 100% safe and secure as only you have access to your data and easy to use, backs up GBs of data in just few clicks, they say job done within 5 minutes.
Download or Buy Now Android Backup and Restore
 |  |
Method 1. How to Backup and Restore Redmi Note 9s/9 Pro/9 Pro Max/8/8T/8 Pro Data to PC Using Android Backup & Restore Software.
Here you will discover simple step-by-step complete tutorials How to use Android Backup & Restore. How It works and helps users to restore data from Redmi Note 9s/9 Pro/9 Pro Max/8/8T/8 Pro.
Section 1: How to Back up Redmi Note 9s/9 Pro/9 Pro Max/8/8T/8 Pro Data to PC.
Section 2: How to restore Redmi Note 9s/9 Pro/9 Pro Max/8/8T/8 Pro with backed-up data.
Steps To Backup Redmi Note 9s/9 Pro/9 Pro Max/8/8T/8 Pro Data To PC.
Step 1- Connect your Redmi Note 9s/9 Pro/9 Pro Max/8/8T/8 Pro to Computer.
Launch Android Data Backup and Restore software on your computer (PC or Laptop) and select the “Backup & Restore” option.

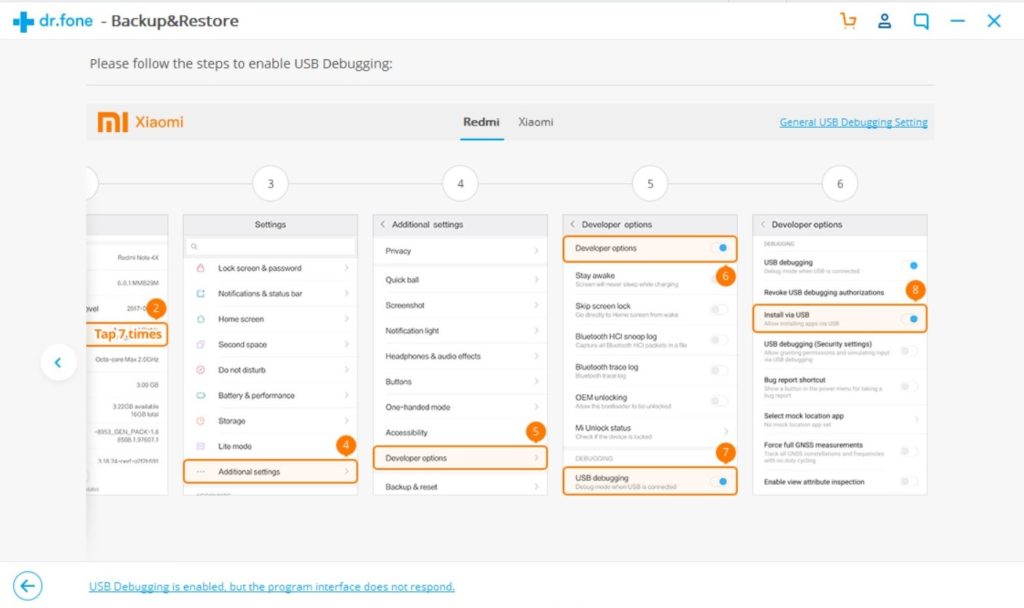
Use a USB cable to connect your Redmi Note 9s/9 Pro/9 Pro Max/8/8T/8 Pro to your computer. Make sure you have enabled USB debugging on your Android phone. When your Redmi Note 9s/9 Pro/9 Pro Max/8/8T/8 Pro is detected on your computer you will get a pop-up asking you to allow USB Debugging.
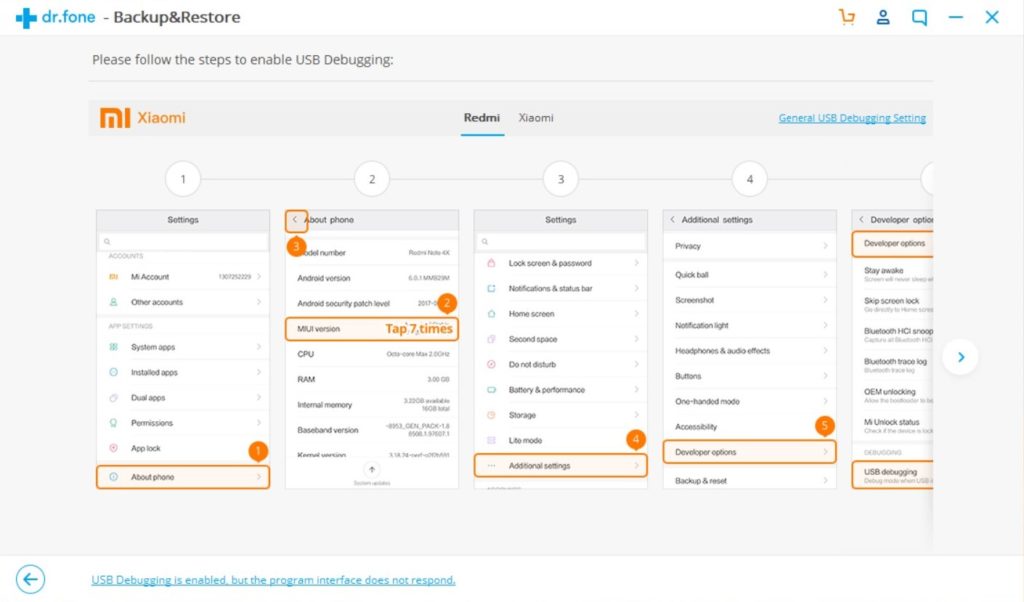
Refer to the instruction given by the software and enable USB debugging and allow app installation via USB, for reference check the images.
Now when your Redmi Note 9s/9 Pro/9 Pro Max/8/8T/8 Pro is connected to your PC, simply click on Backup to start the Android Phone data backup.
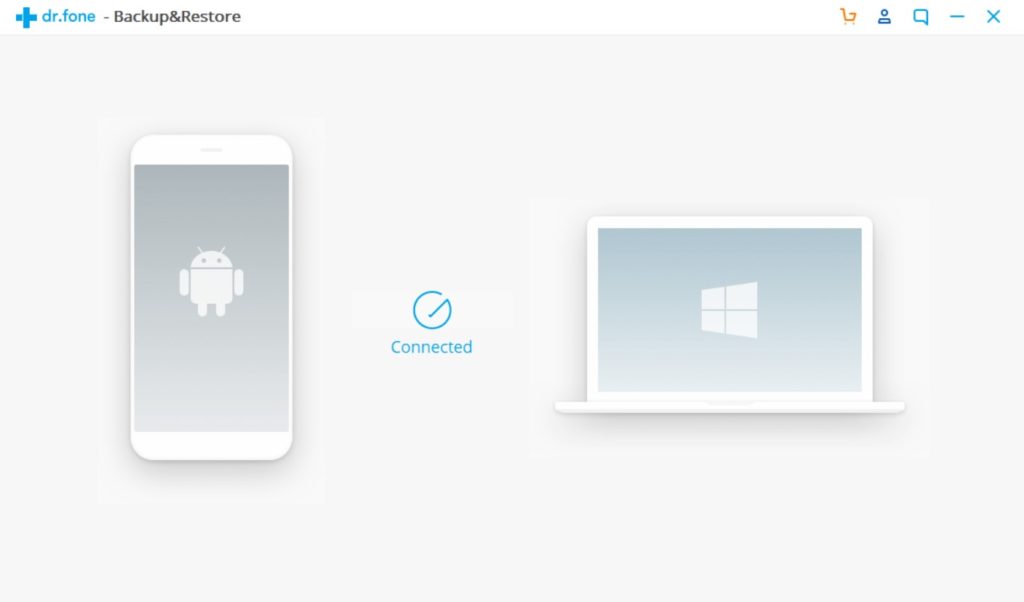
In case you have used the software before and backed up the Android data, then you can click on “View backup history” and view past backup.
Step 2 – Choose types of files to Back up
Once your Redmi Note 9s/9 Pro/9 Pro Max/8/8T/8 Pro gets connected with Computer, choose the types of files you wish to backup, the software is programmed to automatically check all the types of files for you. Now just press on “Backup” to begin the process.
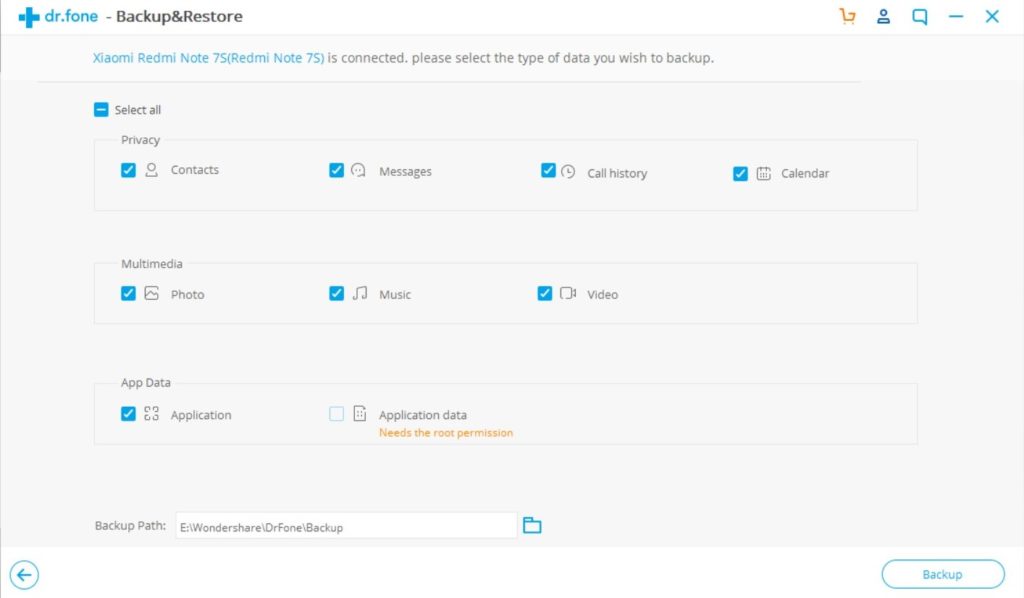
During the backup process do not disconnect the Redmi Note 9s/9 Pro/9 Pro Max/8/8T/8 Pro; don’t use your Redmi Note 9s/9 Pro/9 Pro Max/8/8T/8 Pro or delete any file while the backup process is progress.
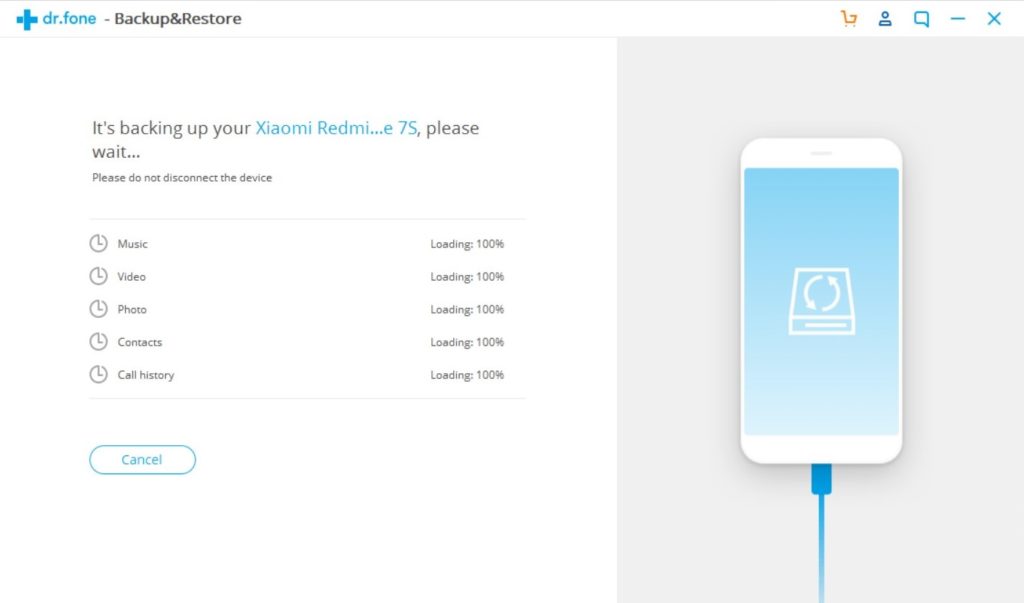
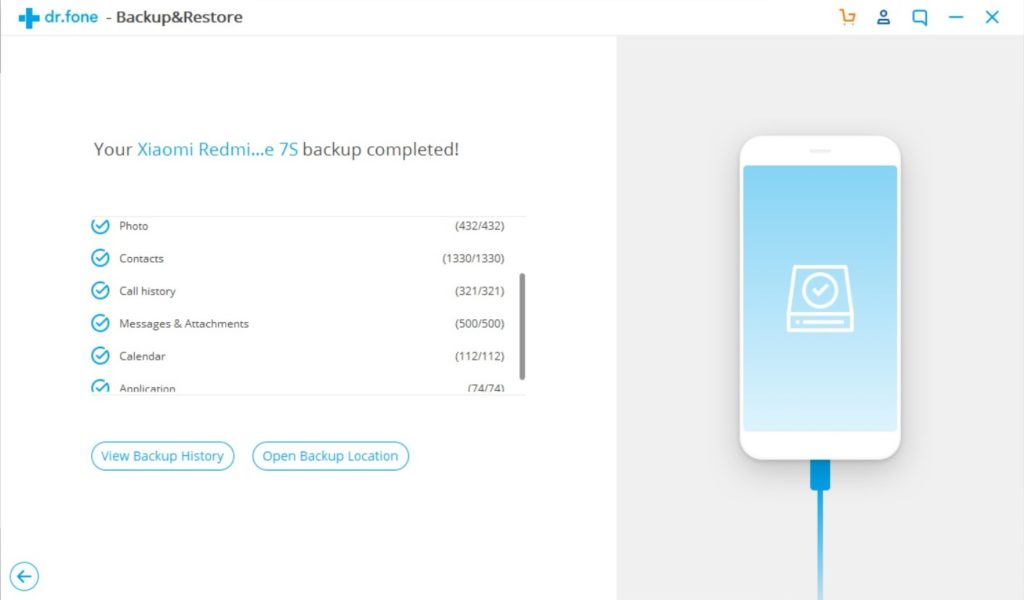
Once the complete backup is done, you can press the “view the backup” option to see all the files that have been backed up.
Steps To Restore Backed-up Data Back To Your Redmi Note 9s/9 Pro/9 Pro Max/8/8T/8 Pro.
Step 1 – Connect your Redmi Note 9s/9 Pro/9 Pro Max/8/8T/8 Pro to Computer.
Launch Android Data Backup and Restore software on your computer (PC or Laptop), then in tools select “Backup and Restore” use a USB cable to connect your Redmi Note 9s/9 Pro/9 Pro Max/8/8T/8 Pro to your computer.
If you have disabled USB debugging enable it to connect your Redmi Phone with your computer.
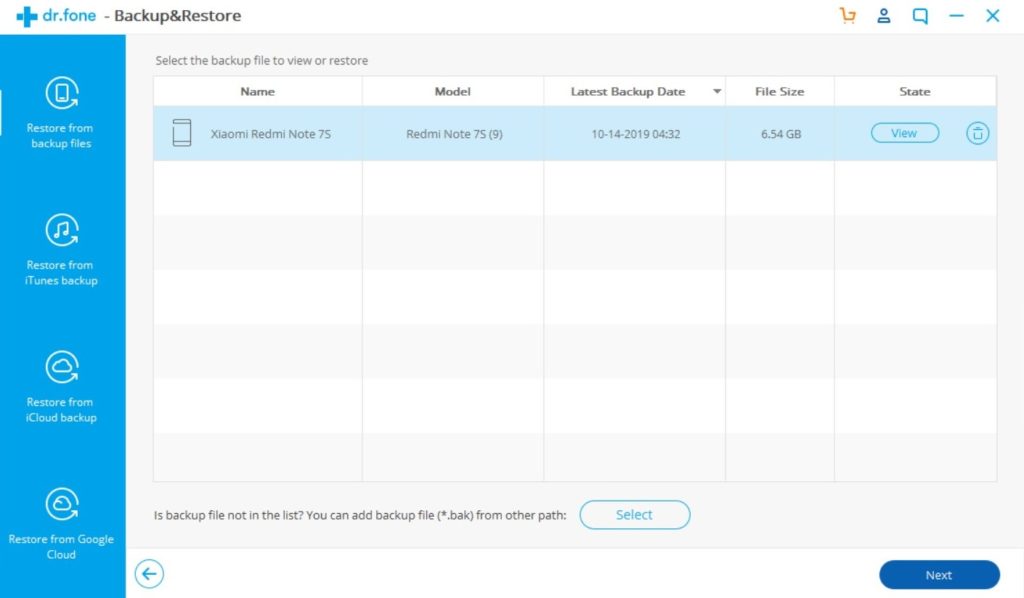
Step 2 – Choose the backup files to want to restore
Now click on “Restore” the Android Backup & Restore Software will show all the backed up data and files on your computer, simply now click and select the file you want and press View next to it.
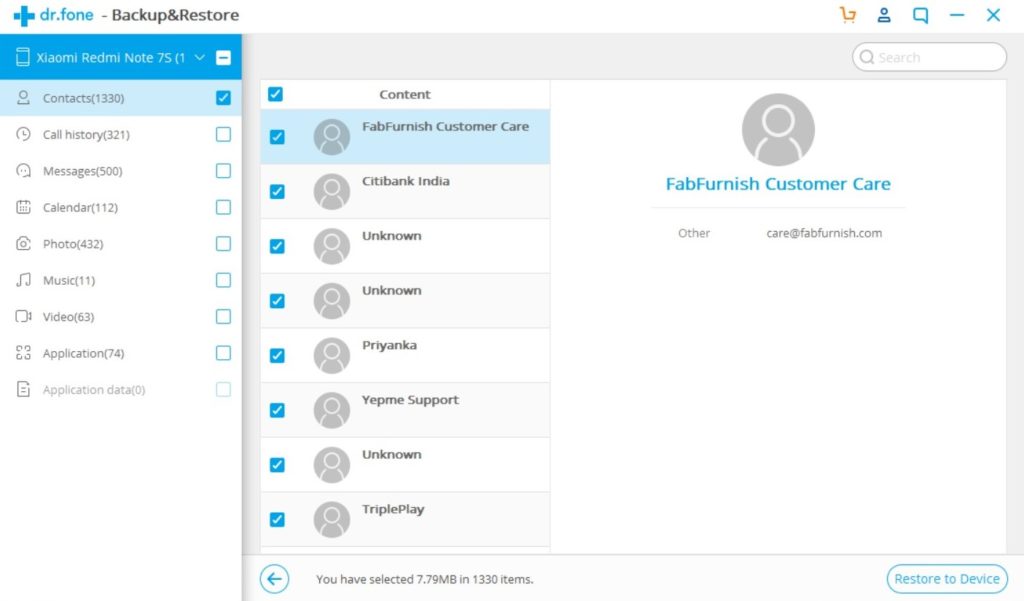
Step 3 – Select and restore the files back to your Redmi Note 9s/9 Pro/9 Pro Max/8/8T/8 Pro.
Here you select the files you need, in a preview of backup files, just select then press on restore to begin the restore process.
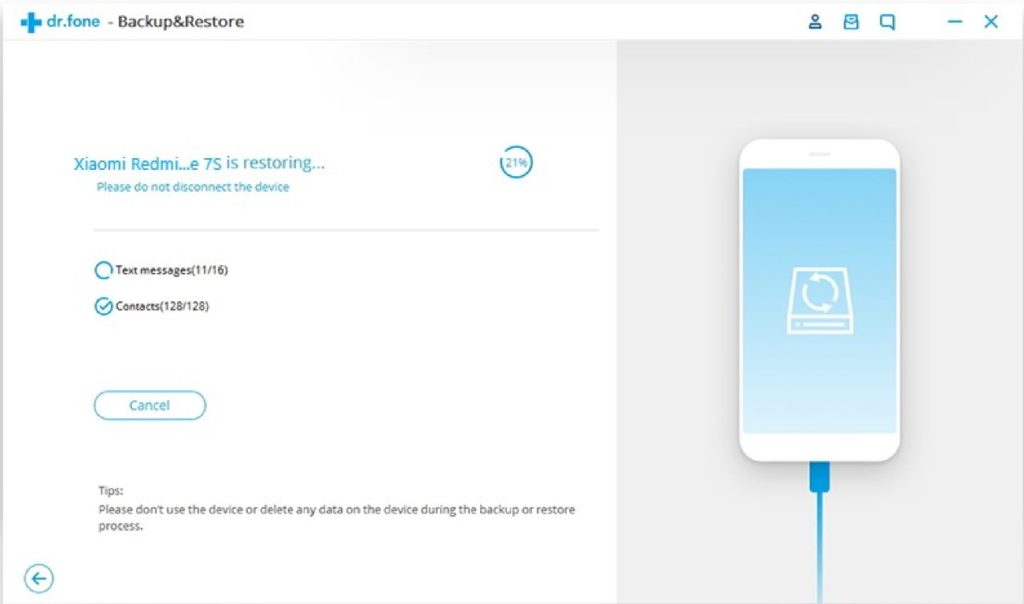
The complete restore process just takes a few minutes, please make sure while the backup process is going on you do not disconnect your phone or use it.

| |
Method 2. How to Backup and Restore Redmi Note 9s/9 Pro/9 Pro Max/8/8T/8 Pro Data Using Google Account.
- Part 1. How to Backup and Restore System and App Data from Redmi Note 9s/9 Pro/9 Pro Max/8/8T/8 Pro Using Google Account.
- Part 2- How to Backup and Restore Documents/ Notes other data to Google Drive from Redmi Note 9s/9 Pro/9 Pro Max/8/8T/8 Pro.
- Part 3. Back up Photos and Videos on Redmi Note 9s/9 Pro/9 Pro Max/8/8T/8 Pro Using ‘Google Photos’.
Google account or Gmail account provides you free combined storage for an account up to 15 GB per account. You can use Google’s cloud service apps like Google Drive and Photos to back up data on your Redmi Note 9s/9 Pro/9 Pro Max/8/8T/8 Pro smartphone, and you can simply manage data and restore it when needed.
Let’s see how to use a Google account to Backup data, with this service you can back up App data, Call History, Contacts, Device settings, Photos & Videos, SMS text messages.
Part 1. How to Backup and Restore System and App Data from Redmi Note 9s/9 Pro/9 Pro Max/8/8T/8 Pro Using Google Account.
Step 1. Go to Menu> Settings>Google.
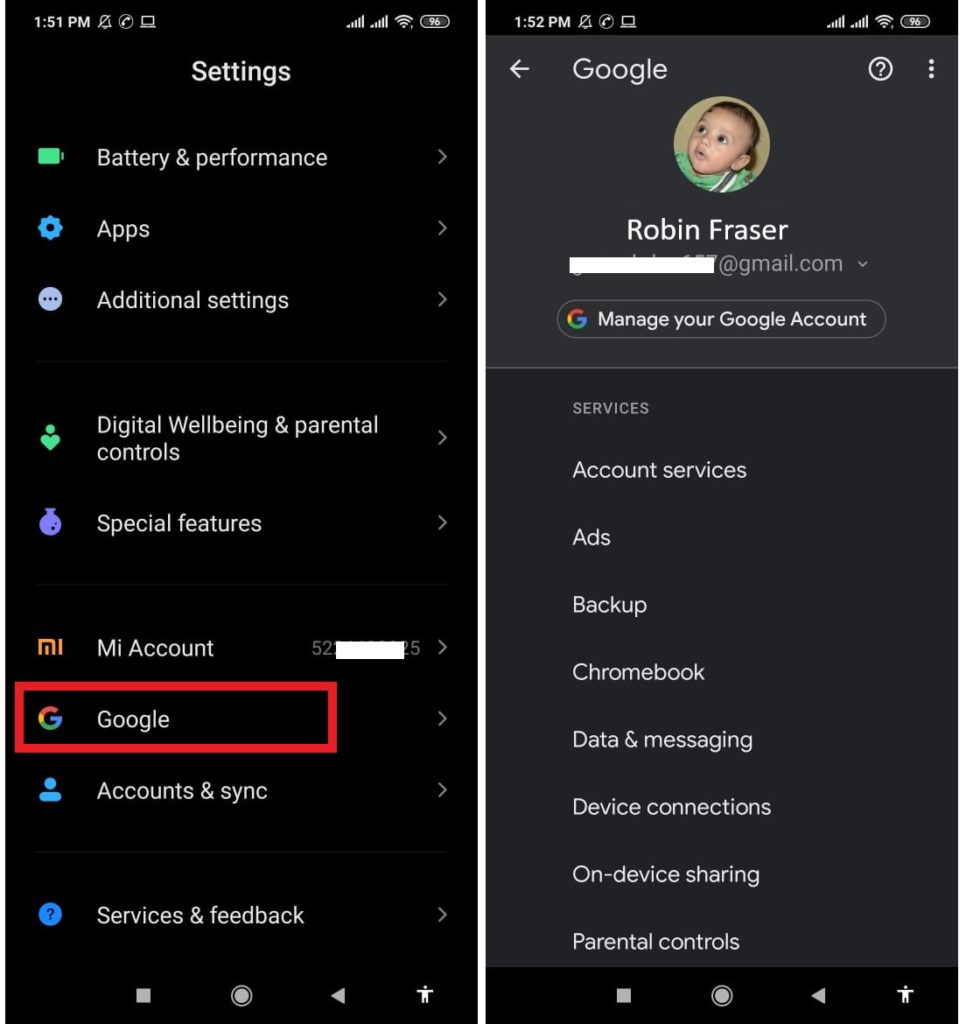
Step 2. Touch and open Google here you can see your Google account info. Among all options click on Backup.
![]()
Step 3. On this Screen you can check your phone’s Backup history, to begin Backup just click ‘Back up now.’
Restore System and App Data Data from Google Backup to Redmi Note 9s/9 Pro/9 Pro Max/8/8T/8 Pro.
Your Apps and apps data are saved on google account if you delete an app, later when you again install it it’s automatically restored to backed up app data. You just have to make sure you are logged in with the same account credential which was used for backup.
If your reset your phone just log in with the same Gmail account and it will automatically restore to the latest backup.
Part 2- How to Backup and Restore Documents/ Notes other data to Google Drive from Redmi Note 9s/9 Pro/9 Pro Max/8/8T/8 Pro.
Step 1- Go to Menu and open File Manager, check the images below the area highlighted in green for reference.
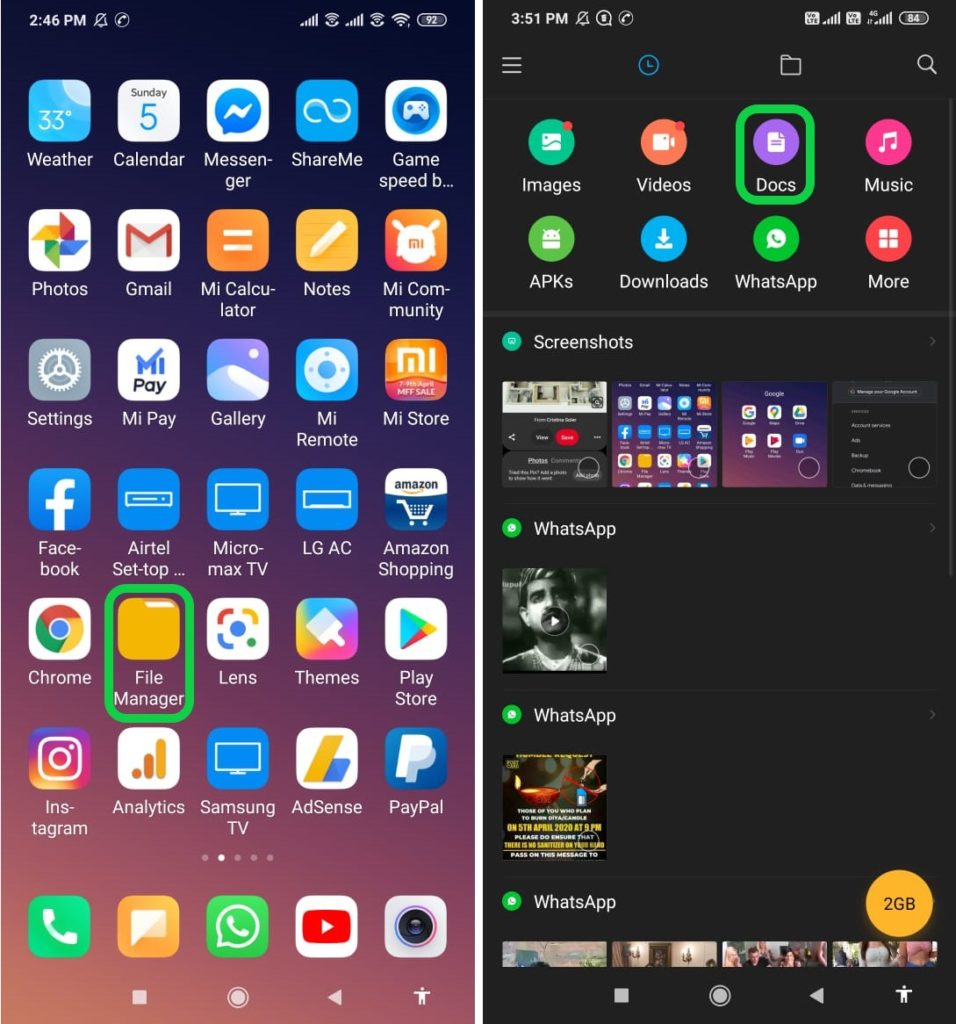
Step 2- On the File Manager screen tap and open Documents and select all Documents you want to backup to Drive.
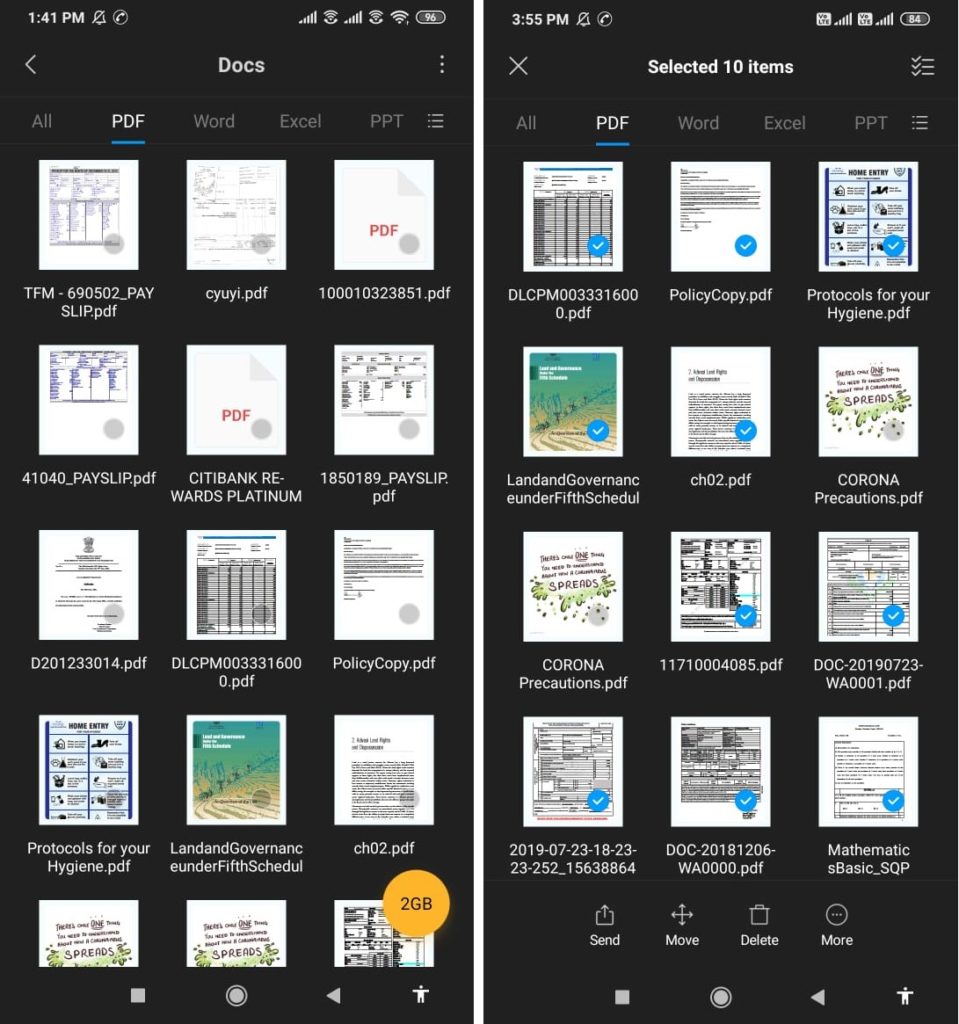
Step 3- Once you have selected the documents you want to backup click on ‘SEND’, after you click send you can see options, out of all available options select ‘DRIVE’.
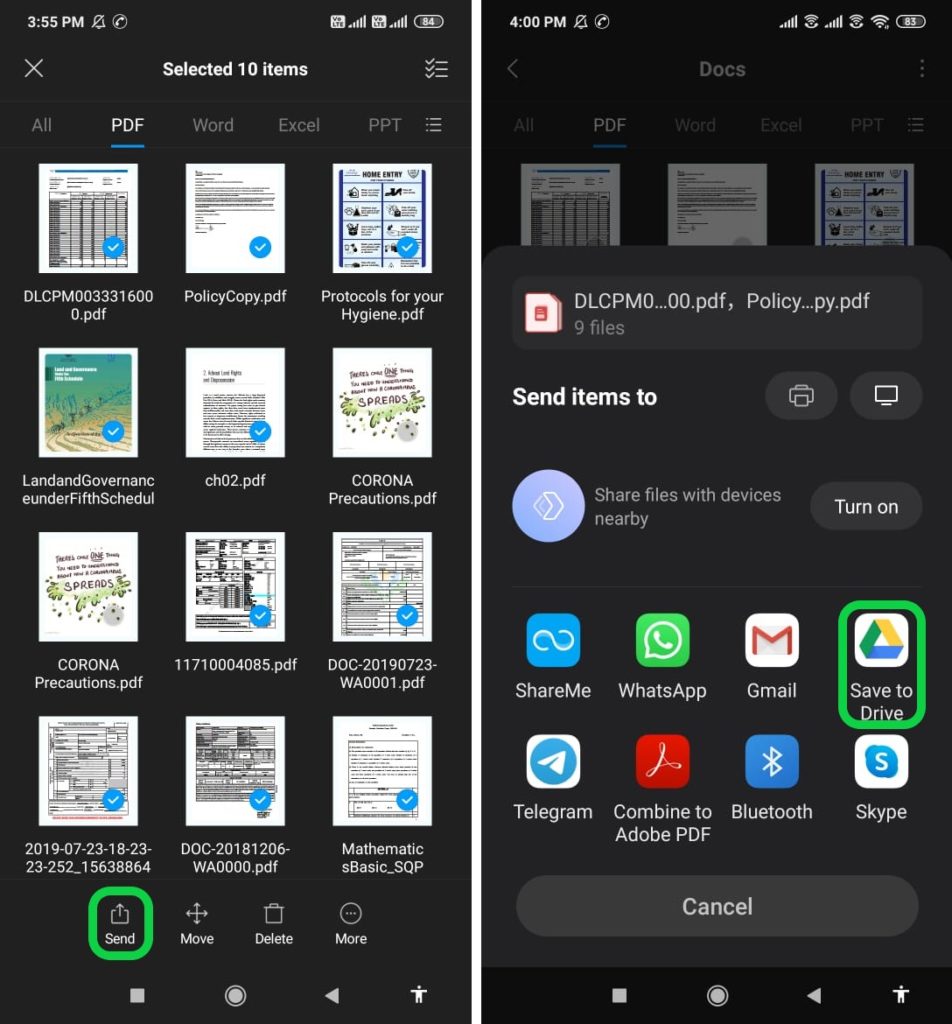
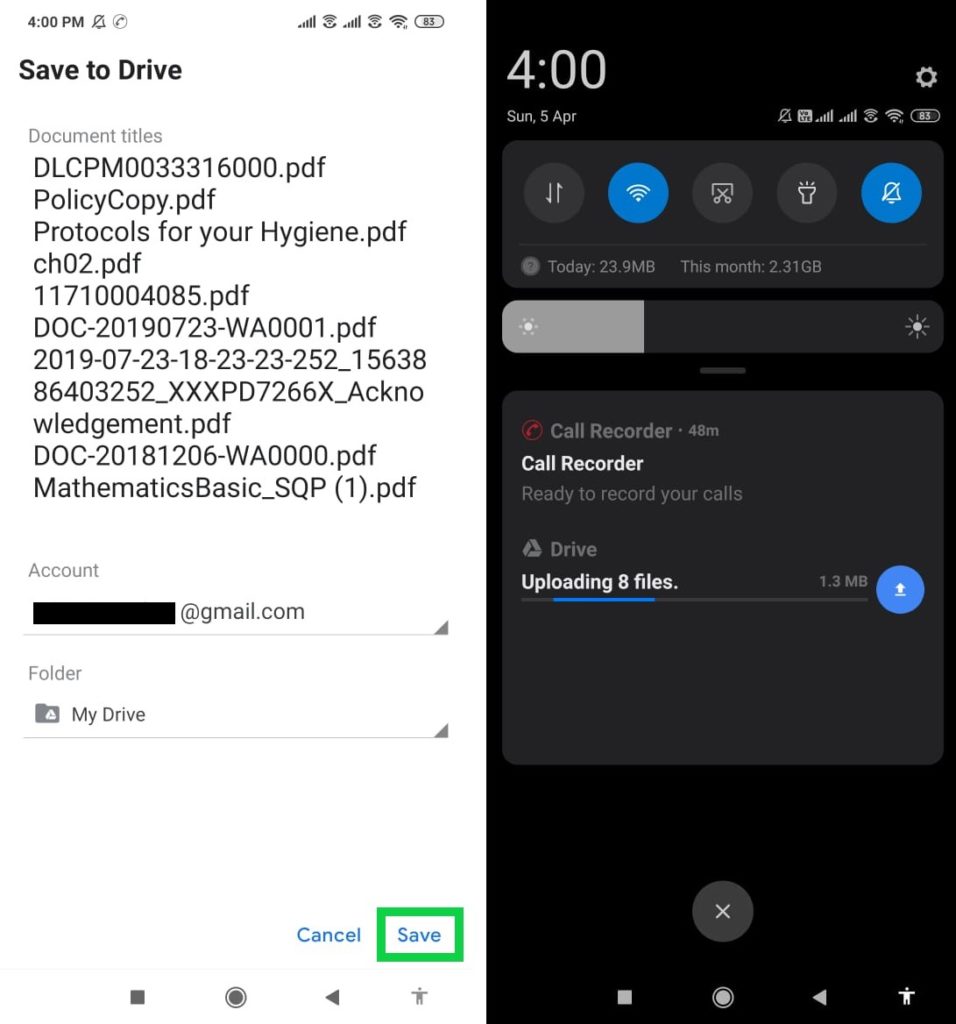
Step 4- On the next screen select ‘SAVE’ and all the selected documents will be uploaded to DRIVE.
Note – You need an active network connection to backup data to Drive.
How to Restore backup data from Drive to computer/ Redmi Note 9s/9 Pro/9 Pro Max/8/8T/8 Pro.
Step 1. Open the ‘Drive’ app on your Redmi Note 9s/9 Pro/9 Pro Max/8/8T/8 Pro smartphone or you can open a browser on your Computer & go to https://drive.google.com.
Step 2. Sign in with the same Gmail id that you used to back up your Redmi Note 9s/9 Pro/9 Pro Max/8/8T/8 Pro to Google drive.
Step 3. Once you sign in, you can preview all the uploaded files.
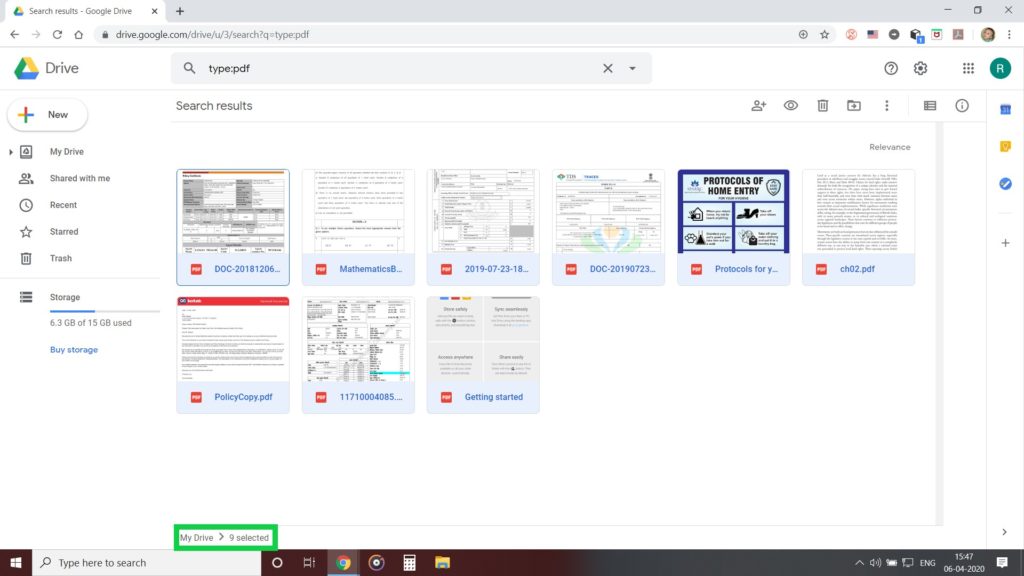
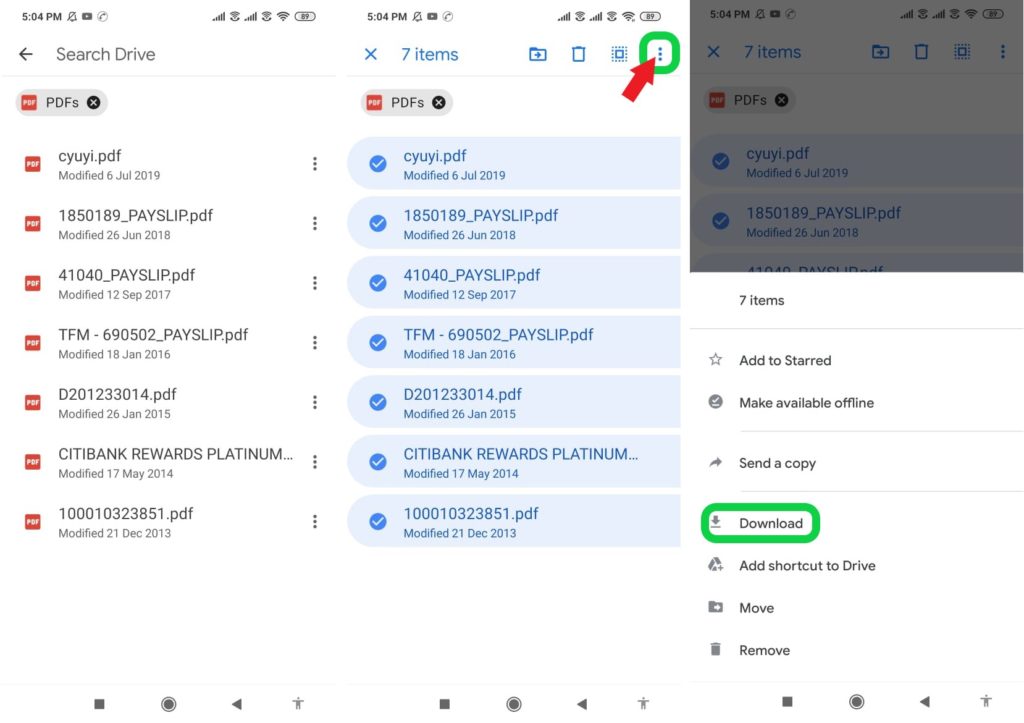
Step 4. Now select the file and download it. To download multiple files on the computer, press ‘SHIFT’ to select other files. You can see the number of files selected as shown in the image below highlighted in the green box.
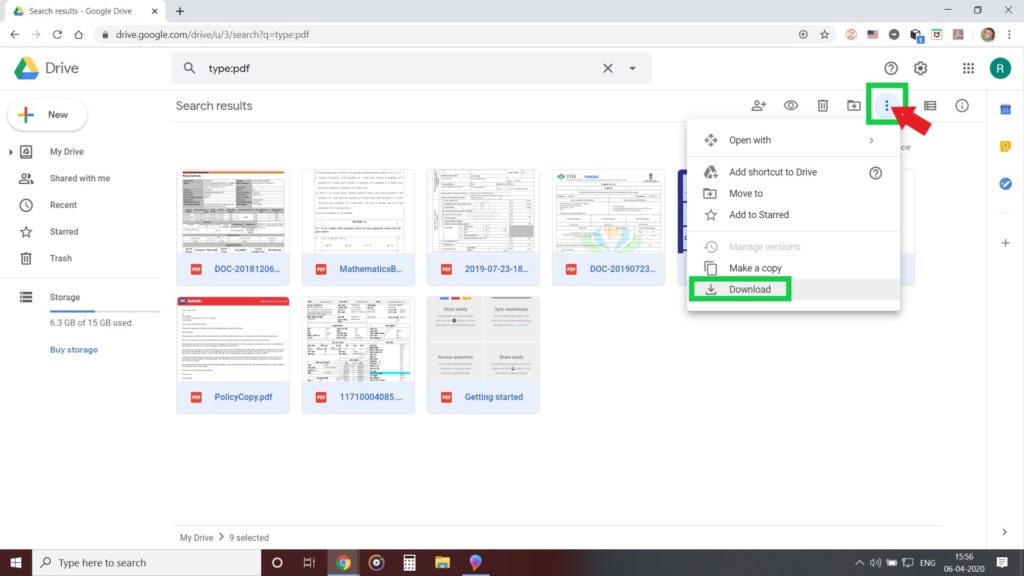
Step 5. Once you have selected files, click on three dots to see the download options check image below the dots are shown by Red Arrow, and click on download and all selected files will be downloaded and restored.
Same you can do on your Drive app on your Redmi Note 9s/9 Pro/9 Pro Max/8/8T/8 Pro smartphone and Restore data from Drive. Open Drive App to access file types quickly just click on the search box and you can see all Data types.
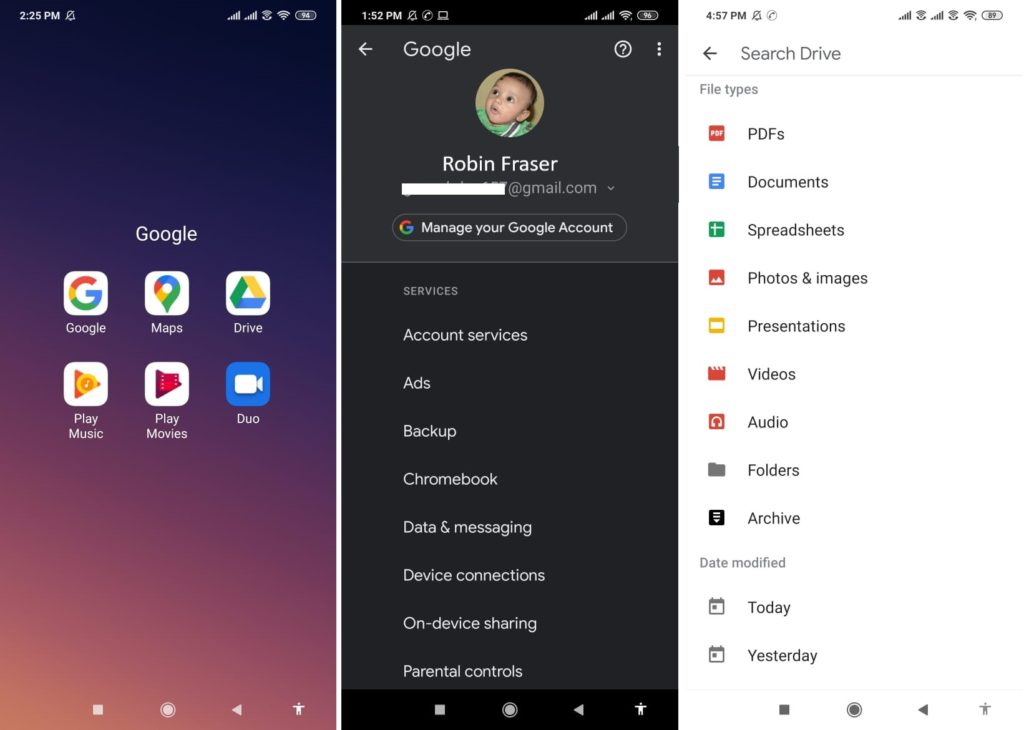
Tap on Data you want to restore. Long press to select the files you want to restore, then click on the 3 DOTS to see the DOWNLOAD option. Check the image below for reference the red arrow shows the 3 DOTS.
Click on Download and all selected files will be restored back to your Redmi Note 9s/9 Pro/9 Pro Max/8/8T/8 Pro.
Part 3. Back up Photos and Videos on Redmi Note 9s/9 Pro/9 Pro Max/8/8T/8 Pro Using ‘Google Photos’.
The best ways to backup your ‘Photos and Videos in your Redmi Note 9s/9 Pro/9 Pro Max/8/8T/8 Pro use Google’s App ‘Photos’. Photos is an Apps that helps you backup all your photos and videos on your phone, you can log in to the Google id anywhere and modify or view your photos, videos on any device.
Step 1. Log in to ‘Google Photos’ using a Google account on your Redmi Note 9s/9 Pro/9 Pro Max/8/8T/8 Pro.
Step 2. Touch on the three horizontal small lines on the top left side and go to settings.
Step 3. On the next screen touch on ‘Backup & Sync’ and toggle and turn it ‘On’ if it’s not ‘On’.

You are all done now all your ‘Photos and Videos’ from Camera will be Backed up to ‘Photos’, you can access all the backed up ‘Photos and Videos’ anytime anywhere on any device just have to log in to the Google account.

If you want others folders photos and videos on your Redmi Note 9s/9 Pro/9 Pro Max/8/8T/8 Pro also to be backed up to Photos, go to Photos’ Settings > Backup & sync > Back up device folders.

Here you can see all the folders that can be backed up choose the ones you want to sync with photos, just toggle the switch on in front of the folders. All marked on folders will be back up to photos.
Restore or Download Photos and Videos from Photos.
To restore backup photos and media login to your google account on your computer, open photos, just go to photos.

Select the files and click download from the option available on the three dots on the top right corner of your screen, or click ‘Shift’ ‘D’ and all selected files will be downloaded to the computer storage.

Note: To use all the above services and to keep Backup in sync active network service is required.
Method 3. How Backup and Restore Redmi Note 9s/9 Pro/9 Pro Max/8/8T/8 Pro Data Using Mi Cloud.
Like Google Xiaomi also provides its users free cloud storage known as Mi cloud, it has free storage up to 5 GB, you can use it to back up data contacts, messages, gallery, notes, recordings, etc.
Part 1. Back up Redmi Note 9s/9 Pro/9 Pro Max/8/8T/8 Pro data to Mi cloud.
Step 1. Go to Settings scroll down find Mi Account and open it, if you are using it for the first time you have to log in, you get two options to log in, first by entering OTP send to a registered mobile number, second you can enter your Mi account number and password and log in.
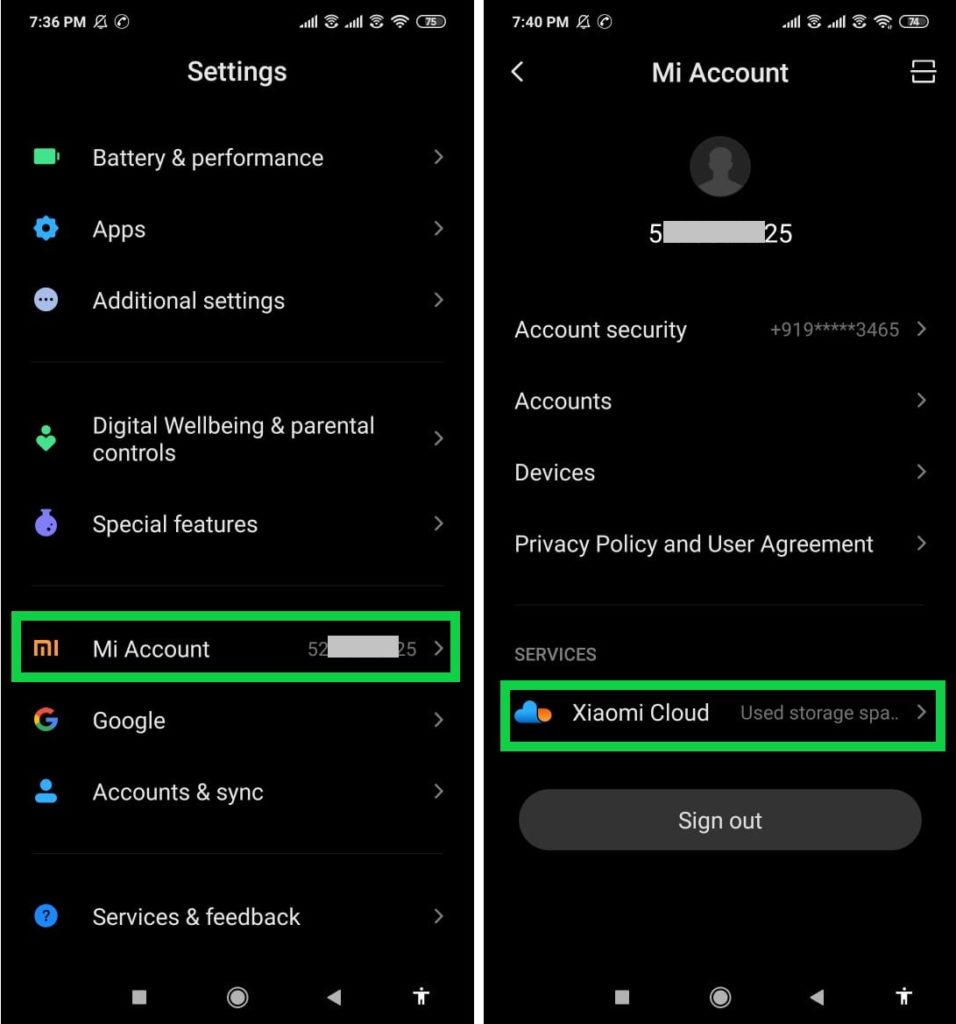
Step 2. Choose what to back up, after you log in on the next screen touch and open Mi cloud and choose content types you want to back up, you have to turn on each content. Now just have to keep sync on and it will automatically back up.
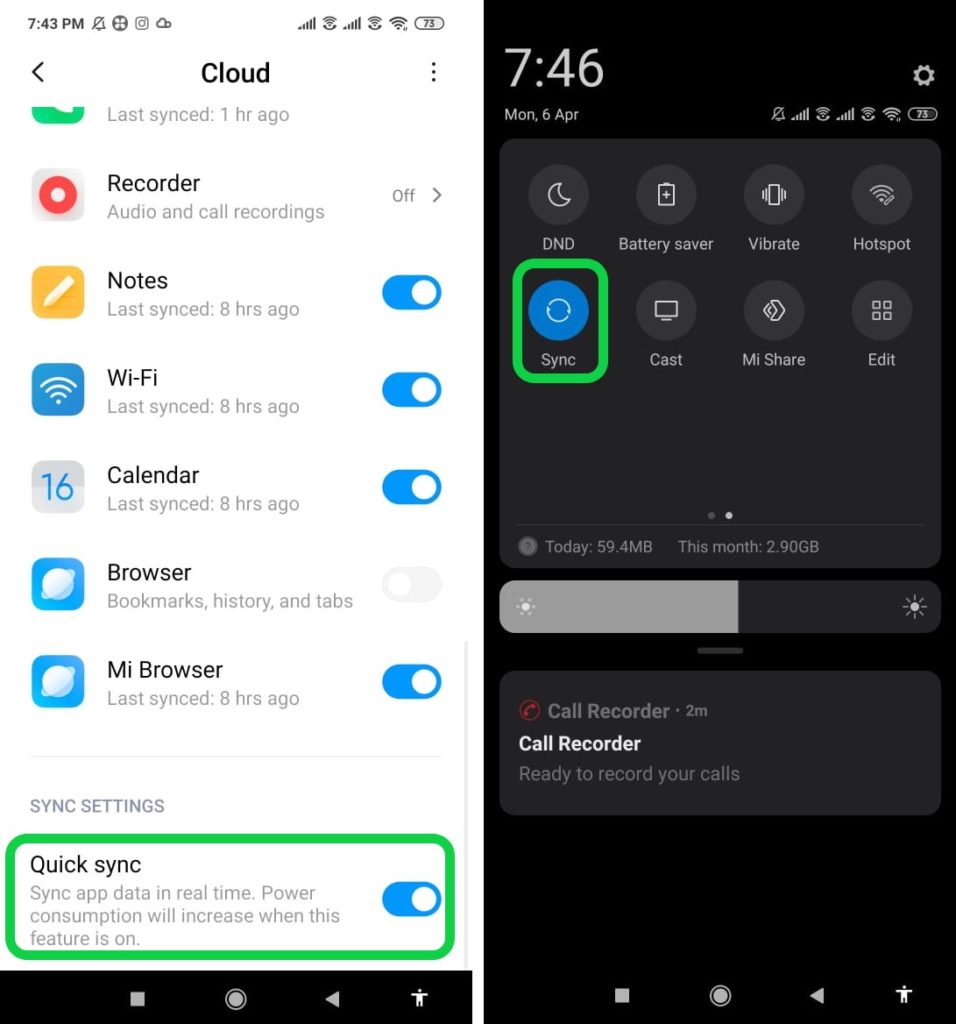
“It’s my recommendation that if you use Mi Cloud don’t back up the gallery to Mi cloud as it has limited 5 GB of free storage, as gallery contains lots of data photos and videos it will consume free space very quickly. Use Google’s Photos app instead to back up gallery its easy to access and have 3 times more storage space”.
Part 2. Restore manage your Redmi Note 9s/9 Pro/9 Pro Max/8/8T/8 Pro Mi cloud data.
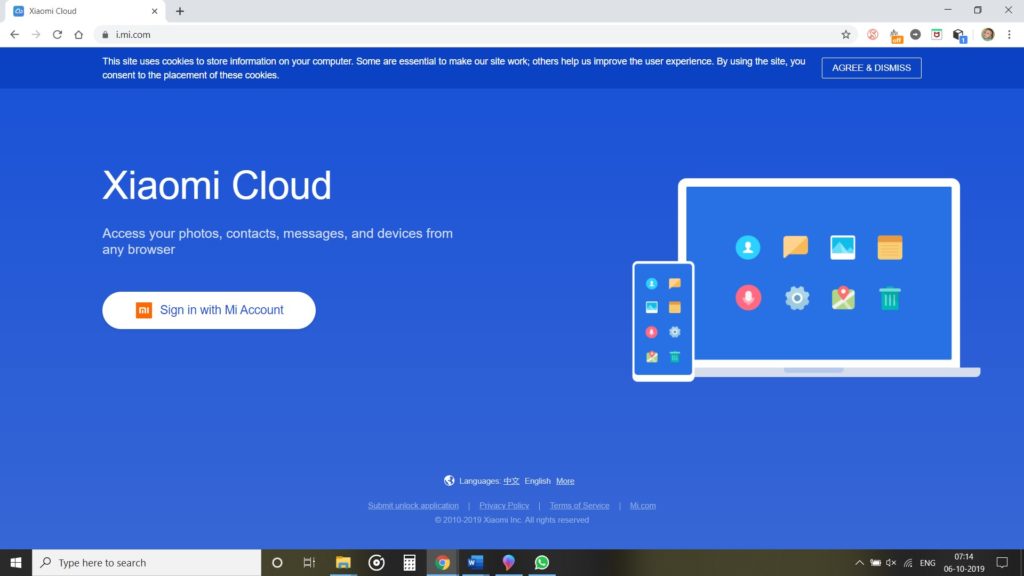
Step 1. Open the browser on your Redmi Note 9s/9 Pro/9 Pro Max/8/8T/8 Pro or on your PC and open https://i.mi.com/ Sign-in into your Mi Account. You can use your phone number linked to your Mi Account and log in.
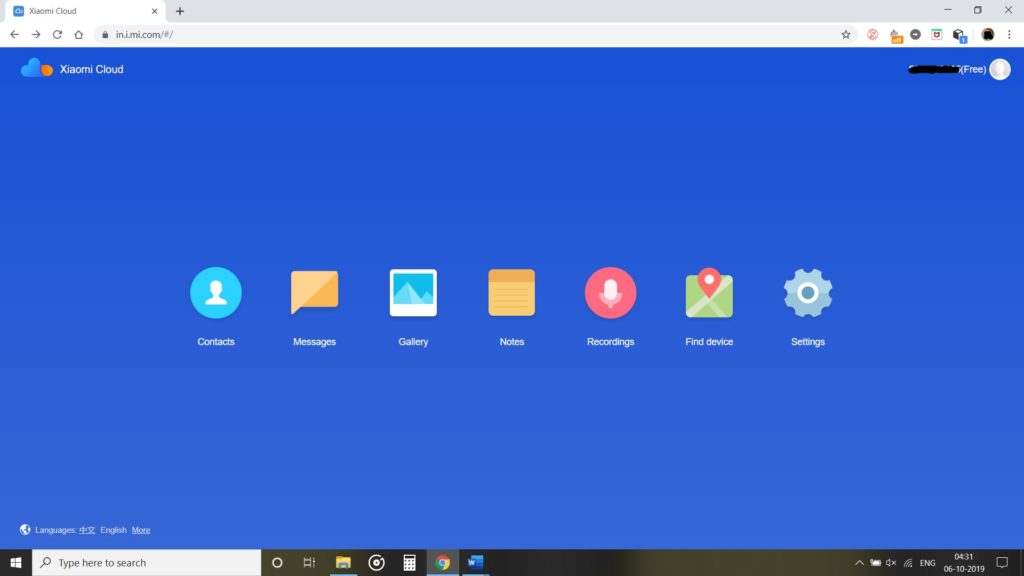
Step 2. Once you are logged in you can see the types of files, click on the content you want, select and download and restore.
Extra Tip: Know How to Recover Deleted Data on Redmi Note 9s/9 Pro/9 Pro Max/8/8T/8 Pro When You Have No Backup.
After taking all precautions yet sometimes you might get into a situation, where you were not able to back some data. The problem occurs when those data get deleted but need not worry!
Thankfully there are tools and solutions with its help you can recover those deleted data. Click on the links below to find out how.
How to Recover Deleted Data from Redmi 8 Series Smartphones.
How to Recover Deleted Data from Redmi 9 Series Smartphones.
Conclusion
Above in this article, we have explained the best methods, on how to backup and restore Redmi Note 9s/9 Pro/9 Pro Max/8/8T/8 Pro. Also, we have given you tips on what to do if have no backup and data gets deleted on Redmi Note 9s/9 Pro/9 Pro Max/8/8T/8 Pro.
Hope this article was helpful, will be back with more such articles and guides if this helped you please share it so that others can also benefit from it.
Like & follow us on Facebook & Twitter, ask if have any questions click on the Contact Us link at end of the page and send us your query, we will help in the best possible we can.